A Coffee desk is extra than just a useful piece of furniture—it’s a critical detail of your dwelling room decor. Building your own DIY coffee table is a fun and worthwhile undertaking that permits you to create a piece that fits your fashion and area perfectly. Plus, it’s frequently lots cheaper than buying one, and you get the pride of getting constructed it yourself!
Whether you’re searching out a simple, minimalist design or some thing a bit extra rustic or current, right here’s how to build your personal DIY coffee table from scratch.
Choose Your Coffee Table Style and Design
Before you begin, determine at the fashion and design of your espresso table. Do you pick a graceful, contemporary appearance, or are you greater into rustic farmhouse decor? A simple rectangular or square table is ideal for novices, but you could get creative with extraordinary shapes and finishes.
Design Ideas:
- Minimalist wood table: Simple and smooth, with straight traces and a natural timber end.
- Industrial style: Combine wood and steel for a present day, commercial appearance.
- Rustic farmhouse: Use reclaimed timber or distressed finishes to create a comfy, rustic vibe.
- Storage coffee table: Add shelves or a bottom tier for added storage space.
Why It Works:
- Matches your decor: Choosing a layout that enhances your current decor ensures your espresso table will healthy seamlessly into your living area.
- Customizable: You can personalize the size, form, and finish to fit your needs and style.
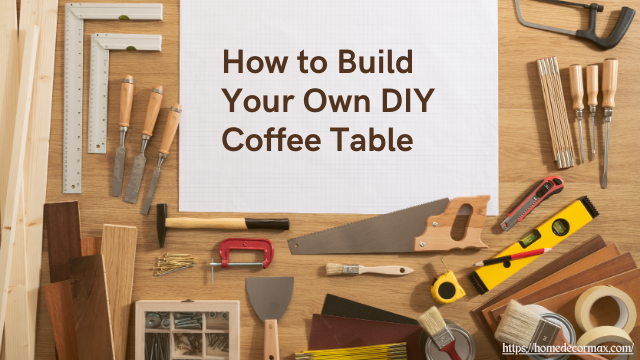
Gather Your Materials and Tools
Once you’ve determined at the design, it’s time to accumulate all of the important materials and tools. Most DIY espresso tables require simple substances and tools that you can find at a hardware store.
Materials:
- Wood planks: Choose the type of wood you pick for the tabletop and legs (e.G., pine, oak, or reclaimed wood).
- Wood screws or nails: For assembling the table.
- Wood glue: To toughen joints and add balance.
- Table legs: You can both build legs from wooden or buy pre-made metallic or wood legs.
- Sandpaper or an electric sander: For smoothing the timber.
- Wood stain or paint: To finish and seal the table.
Tools:
- Saw: For slicing the wood to size (you may have the wooden cut at the hardware store in case you don’t have a noticed).
- Drill and drill bits: For making holes and assembling the table.
- Tape degree: To make certain your cuts and placements are correct.
- Clamps: To keep pieces in area even as the glue dries.
- Paintbrush or rag: For applying stain or paint.
Why It Works:
- Simple gear: Most of the equipment required are fundamental and may be used for different DIY projects as well.
- Affordable substances: Building your very own espresso desk is regularly inexpensive than shopping for one, in particular if you use reclaimed or finances-pleasant timber.
Cut the Wood to Size
Now which you have your materials, it’s time to cut the timber to your espresso desk. Depending at the design, you’ll need timber pieces for the tabletop, legs, and probably a decrease shelf.
How to Do It:
- Measure the wooden planks based on the desired length of your coffee table. For a popular rectangular table, cut the timber to about 40″ by 20″ for the tabletop.
- Cut the timber for the legs: If you’re making wood legs, cut 4 pieces of timber to the identical height (about 16-18″ is a superb height for a coffee table).
- Sand the edges: After slicing, sand the edges of the timber to make certain clean, splinter-loose surfaces.
Why It Works:
- Custom sizing: Cutting the wood yourself permits you to build a espresso desk that suits flawlessly in your area.
- Smooth finish: Sanding the wood ensures that the completed table appears polished and professional.
Assemble the Tabletop
Once your wooden is reduce to length, the next step is to gather the tabletop. If you’re using multiple planks, you’ll need to join them together.
How to Do It:
- Arrange the planks for the tabletop: Lay them facet with the aid of side and ensure they fit collectively well.
- Glue the planks collectively: Apply wooden glue along the edges in which the planks meet. Clamp them collectively tightly and permit the glue dry for numerous hours (or in line with the glue’s instructions).
- Reinforce with screws: Once the glue has dried, turn the tabletop over and use wood screws to connect go helps (smaller portions of wood) to the underside. This will keep the tabletop stable and secure.
Why It Works:
- Strong and solid: Gluing and screwing the planks together creates a robust tabletop that received’t shift or warp over time.
- Simple construction: Assembling a tabletop from planks is an clean technique, even for beginners.
Attach the Legs
With the tabletop assembled, it’s time to connect the legs. You can either build simple timber legs or use pre-made steel legs for a present day or business appearance.
How to Do It:
- Position the legs: Place the legs at each nook of the underside of the tabletop. Make sure they’re aligned frivolously.
- Drill pilot holes: Before attaching the legs, drill small pilot holes in each the legs and the tabletop to save you the wooden from splitting.
- Attach the legs with screws: Use wood screws or steel brackets to safely fasten the legs to the tabletop.
- Reinforce with timber glue: For more balance, practice wooden glue to the joints before screwing the legs in area.
Why It Works:
- Easy meeting: Attaching legs is a straightforward procedure that calls for simplest a drill and screws.
- Customizable look: Whether you select timber or metallic legs, this step allows you to customize the style of your espresso table.
Sand and Finish the Table
After assembling the coffee table, the very last step is to sand and end it. This will easy out any rough edges and supply the wood a cultured, professional look.
How to Do It:
- Sand the entire desk: Use excellent-grit sandpaper or an electric sander to clean the floor and edges of the tabletop and legs.
- Wipe down the desk: Remove any dirt or debris with a damp cloth after sanding.
- Apply stain or paint: Choose a wooden stain to spotlight the natural grain of the timber, or paint the table for a bold, colorful end. Use a brush or rag to apply the stain or paint frivolously.
- Seal the wooden: Once the stain or paint has dried, observe a coat of clean polyurethane or timber sealer to defend the surface from scratches and spills.
Why It Works:
- Polished end: Sanding and sealing the desk offers it a professional, first-rate end that will ultimate for years.
- Protects the wood: Sealing the timber helps guard the table from regular put on and tear.
Add Custom Touches (Optional)
If you want to take your DIY coffee table to the following level, recollect adding custom touches like a backside shelf, decorative hardware, or unique paint effects.
How to Do It:
- Add a lower shelf: Cut a piece of wood to in shape between the legs and fix it for added garage area.
- Add wheels or casters: For a extra mobile coffee desk, connect small wheels to the lowest of the legs.
- Decorative hardware: Use metal brackets or corner pieces to add an business or vintage contact to the table.
Why It Works:
- Personalizes your assignment: Adding custom details guarantees that your coffee desk is one-of-a-type and displays your non-public style.
- Functional and fashionable: Extras like a lower shelf or wheels can upload each style and functionality on your table.
Conclusion
Building your own DIY coffee table is a rewarding mission that allows you to create a custom piece of furnishings for your own home. Whether you choose a simple timber design or something more tricky, the method is approachable even for beginners. With a few primary tools, substances, and a bit creativity, you may construct a coffee table that’s both purposeful and fashionable—with out spending a fortune.
Ready to start constructing? Follow these steps and revel in the satisfaction of making your own personalized espresso table!